

Attach a Sidecar to a Royal Enfield 350/500cc
Unpacking the sidecar
These are general instructions. Nut and bolt sizes, placement of items, etc. may change from these instructions Although there are differences in the 350/500cc Royal Enfields, for the most part, the sidecars mount in the same way.
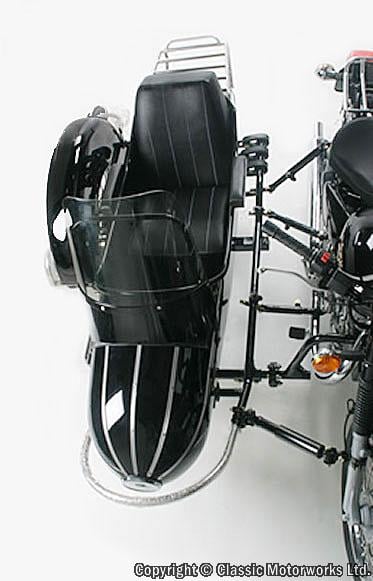
The sidecar body is mounted on the sidecar frame, and the frame is bolted to the shipping crate. The entire car and its parts are contained in the crate. You will find the wheel, fender, bumper guard, and a corrugated box. The corrugated box contains the windshield, seats, and hardware. Care should be taken to look carefully for nuts, washers, or bolts that may have worked free in shipment and migrated to the bottom of the case. You will be using 10 – 19mm wrenches, one 13/16 inch wrench, one self-adjusting wrench, and a pry bar
Remove the wheel by releasing it from the side of the crate, with a 13/16" spanner or socket (RE Spark plug tool).
Remove the fender by releasing the two 10mm bolts holding it to the crate. You will need to reach inside the fender to find the attaching nuts.
Use a pry bar to remove the two cross-braces from the crating. Then remove the nails from the crate side to avoid injury to yourself or damage to the car finish.
Remove the chrome car side bumper. It is not bolted down.
Remove the luggage rack from the rear of the crate by releasing the four 10mm bolts.
Remove the two 10mm bolts from the front end of the crate to release the strap holding the front chrome bumper bar. Remove the right rear 13/16 bolt threaded through the crate into the car frame. Remove the four (4) 15mm bolts and nuts holding the frame to the crate.Remove the sidecar carefully and place it on the right side of the motorcycle. The frame should be horizontal, and it may help to place the frame on secure jack stands or secure cribbing. You may also find it helpful to remove the body from the frame before continuing to assemble the sidecar. This step is not mandatory but can make the rest of the job easier. The body is held to the frame with bolts, some of which can be reached through the rear locked compartment.
There are four attachments
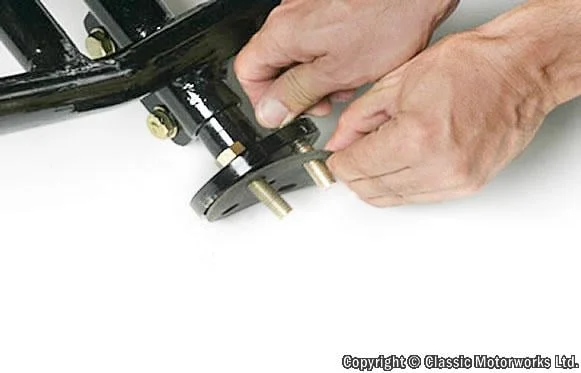
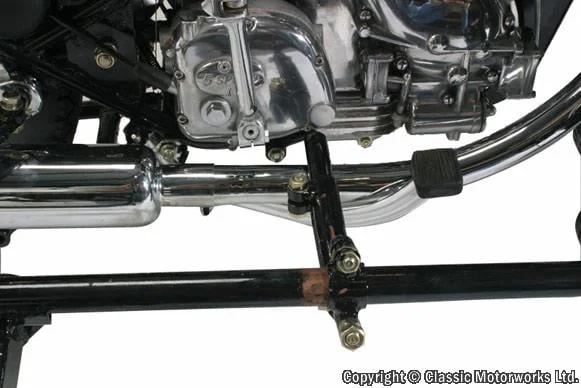
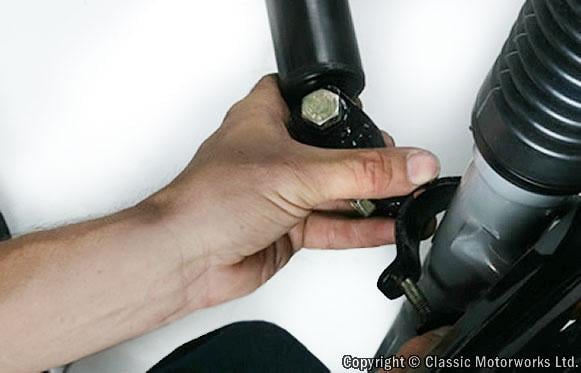
1) The first attachment is called main bracket assembly, which consists of the main bracket and the connection tube. The main bracket is the large bracket in the front of the sidecar frame with the flange fitting on it. This is meant for connecting the sidecar to the front frame tube of the motorcycle. The main bracket has a large flange plate bolted to it which then bolts to a mating flange which in turn clamps onto the front frame tube of the motorcycle.
Remove the four bolts from the flange on the main bracket using two 19mm spanners.
2) Remove the tie wraps holding the motorcycle wiring to the front tube of the motorcycle. Relocate the wiring so it is not pinched when the main bracket is clamped to the front tube of the motorcycle.
Note: For Electra models, the metal wire-retaining strap may need to be removed to allow the clamp to fit properly. On some Royal Enfield models you may have to cut off the horn attachment lug and relocate the horn.
Remove the large nut holding the frame clamp onto the front mounting bracket.
Remove the four nuts and bolts holding the frame clamp together.
Position clamp over the front frame of the motorcycle so that the large mounting hole is inside the frame and lightly tighten the bolts with the Nuts
Insert the main mounting bracket in the front frame clamp and install lock washer and large nut finger-tight.
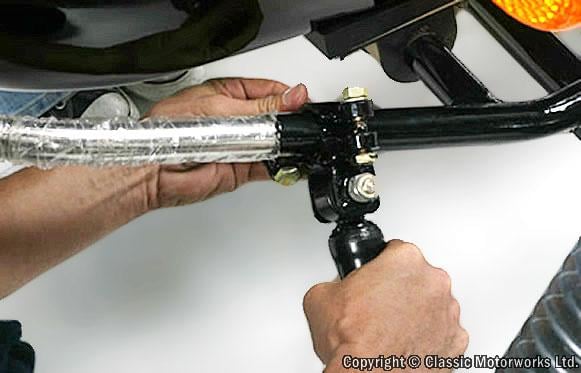
3) Then bolt the flange of main mounting bracket to the flange of the sidecar frame. Finger-tighten bolts. Remember to insert the rubber gasket between the flange plates. (See Figures 4, 5 and 6)


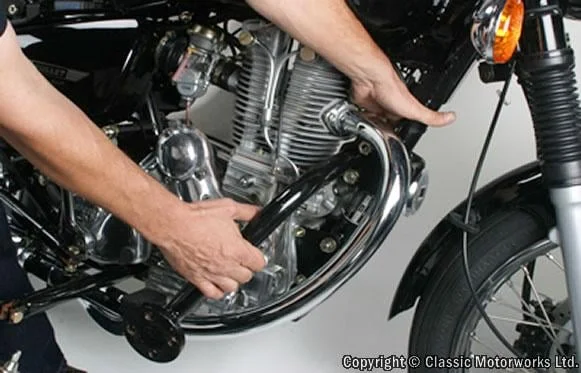
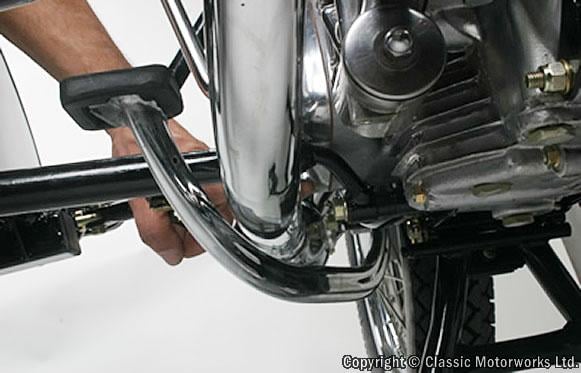
Step 2: The most rearward attach point
Remove the upper shock absorber bolt from the motorcycle.
Remove the upper shock absorber bolt from the shock on the motorcycle and replace it with the mount bolt.

Connect the sidecar to the motorcycle at the upper shock absorber mounting point. It is helpful to remove the clevis bolt from the telescopic attachment tube and loosen all the clamping bolts on the tube before making attachment.

To position the tube between the clevis tab now bolted to the shock mount, and the car frame it may be necessary to rotate one or both clevis tabs. The tube also can be telescoped and/or rotated to fit between the car and the motorcycle. A light tapping with a rubber mallet may need to be used for positioning.


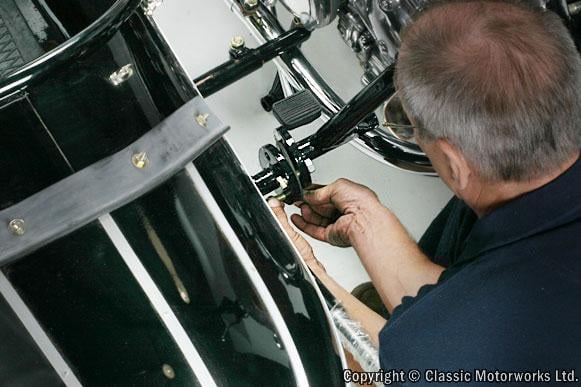
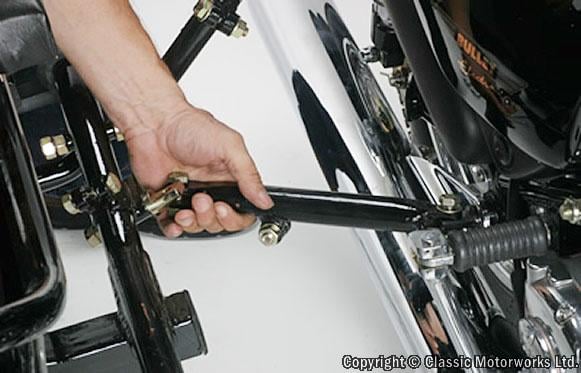
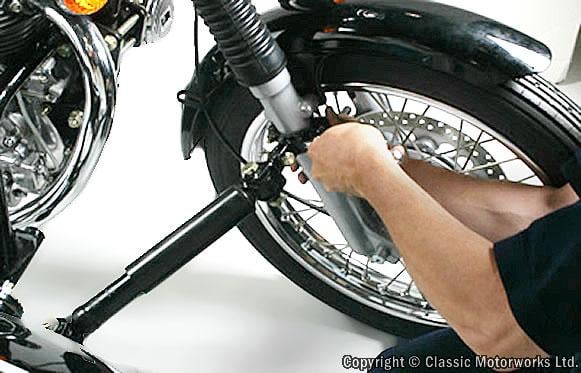
Step 3: Second (from the front) attaching point
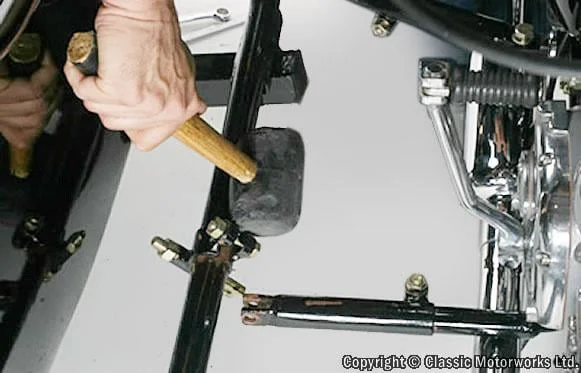
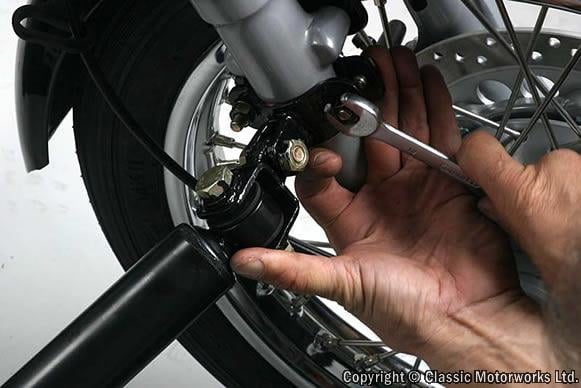
Remove the right-hand side front footrest (rider's footrest). Fix this bracket assembly as shown in the picture. The socket is hexagonal to fit over the footrest shaft. It may be necessary to clean the paint from inside the bracket before it will slip onto the hexagonal footrest shaft. In some newer models, you may have to enlarge the hexagonal hole in the strut to allow it to fit OVER the footpeg mount. In either case, the strut is secured to the motorcycle with a nut and washer
You may have to move the clamp on the sidecar fore and aft for proper alignment to this attachment. A light tapping with a rubber mallet may need to be used for positioning.
Note: You may want to apply some 3-M no slip adhesive tape on this bar which will now act as your footrest. Some customers also cut the end off of a foot rest rubber and slide in onto this attaching bar.
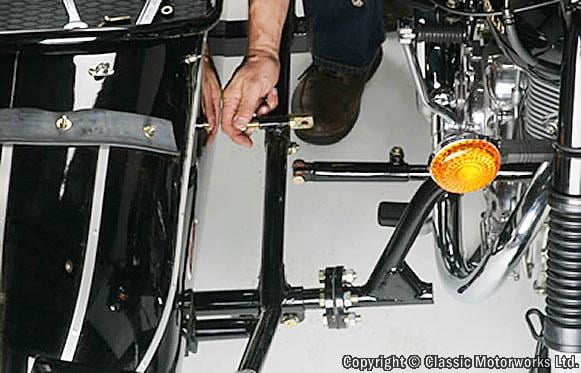
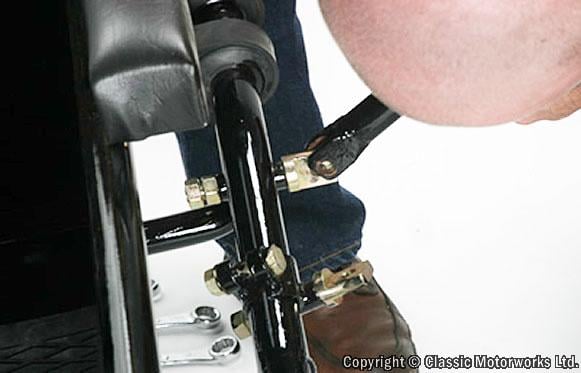
Step 4: Rear passenger foot rest bracket
Third attachment is called Rear Foot Rest Bracket. Remove the rear footrest and foot rest bracket. Find the short clevis tab in the hardware kit. Bolt this assembly in place of the Rear Footrest Bracket as shown in above left picture.

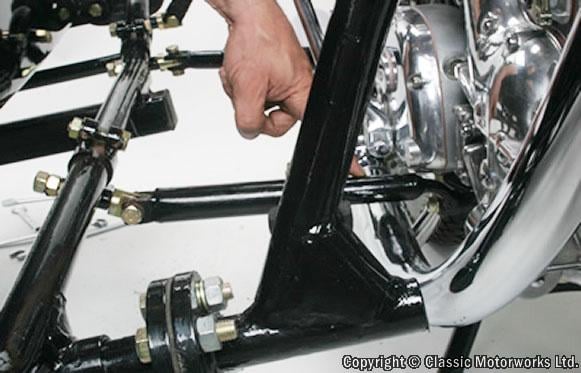
Third frame clamp attachment can slide back and forth on the sidecar frame tube for adjusting the required position. A two dimensional triangle is the strongest configuration.
Note: During the installation it is normal and in fact likely necessary to damage the paint of the attaching pieces. It can easily be touched up later when the rig is installed and aligned properly
Step 5: Mounting the steering dampener
Release the clamp bolts and remove the clamp halves. Release the pivot bolts slightly to allow positioning of the steering dampener to the sidecar frame and to the motorcycle fork lower leg (don't forget the rubber between the fork leg and the clamp). It is best to get as much travel as possible in the dampener without reducing side to side steering movement. Achieve this by mounting the fork clamp high, just below the fender tabs. The small end can be moved as far rearward as possible toward the cross member. See pictures below.
Here is a good animation of the process produced by a dealer in India
https://youtu.be/KuWgLFkQNyo
Please give us a call with any of your sidecar questions.
623-512-0377
